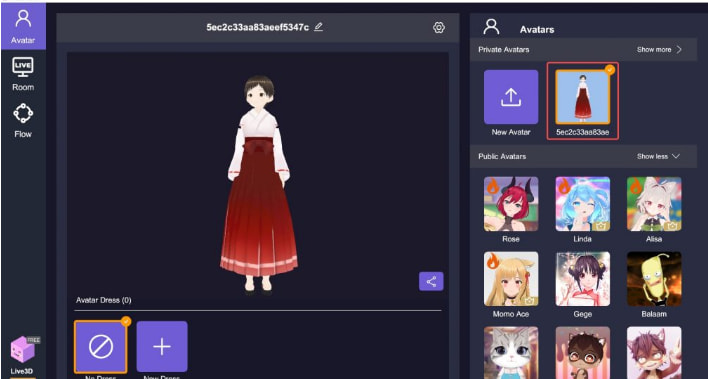
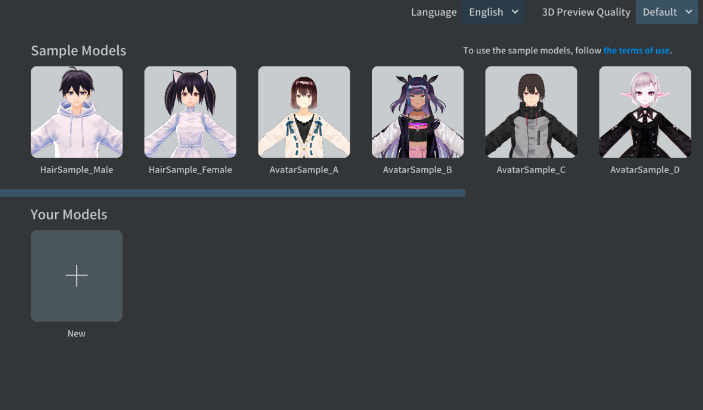
Vroid Studio is a free 3D design tool made by Pixiv for easily creating anime-style avatars. These avatars, called Vroid models, can be customized with various hair, clothing, and accessory options. Once complete, the model can be exported and used in various applications. One great use is broadcasting yourself as a virtual anime character on live streaming platforms!
Setting up a Vroid model for streaming does take some work. You need to export the model, configure it for use in real-time applications, set up motion tracking, and get broadcasting software working with the virtual webcam output. But the end result is a fun, eye-catching anime avatar thatreally stands out.

In this guide, I’ll walk through the entire process step-by-step. By the end, you’ll know:
- How to create and customize a Vroid model
- Exporting optimizations for real-time use
- Motion tracking setup with FaceRig or VRoid Avatar Diver
- Configuring OBS and other software to use the avatar
- Tips for engaging streaming with your anime model
Let’s get started!
Step 1: Create and Customize Your Vroid Model

The first step is obviously to create and customize your Vroid avatar in Vroid Studio. Here’s a quick process for that:
- Download and install Vroid Studio for free from the official website.
- Launch Vroid Studio and click Start Editing to begin creating a model.
- Customize the appearance by choosing a base model, adjusting height and proportions, picking hairstyles and colors, choosing outfits, and adding accessories.
- Use the Pose and Expression features to adjust posture, gestures, and facial expressions.
- When satisfied, export the model by going to File > Export VRM File. Choose a name and export location.
There are tons of customization options so really take your time to make the modelmatch your preferred anime persona. Adjust height, hair style and color, outfit styles and colors, and accessories like glasses. Don’t be afraid to experiment!
For streaming, choose clothing options that minimize physics glitches. Long hair or skirts can sometimes behave erratically in real-time use. Test different poses and facial expressions too.
Spend time getting the modeljust right before exporting it. The default export options work fine, but we’ll optimize it further in the next step.
Step 2: Optimize Vroid Model for Real-Time Use
The default export options from Vroid Studio work okay, but we can optimize the Vroid model for real-time streaming use to maximize performance and minimize odd behaviors.
I recommend running the exported VRM file through the Vroid2Facetune application. This bakes the model’s shape data down to a lower polygon count better optimized for real-time rendering.
To optimize your exported Vroid model:
- Launch Vroid2Facetune and click Load to open your exported VRM file.
- Adjust the polygon reduction strength to around 50% to start. This will cut the poly count in half while preservingoverall shape.
- Enable Zoom Blur Reduction to improve skirt and hair physics.
- Click Tune Model. Test render the model preview to see how it looks.
- If needed, re-load and tune again with adjusted settings. 40-60% reduction usually works well.
- When satisfied, export the tuned model. Make sure to append something like “-tuned” to the filename to distinguish it from the original.
The tuned model will animate much more smoothly and stably in real-time applications. The lower polygon count lightens the processing load as well.
Step 3: Setup Motion Tracking with FaceRig or VRoid Avatar Diver
To animate your Vroid model naturally based on your live movements, you need motion tracking software. This uses your device’s camera to track key points on your face and body to apply to the model’s face and posture.
The two best options for Vroid models are:
- FaceRig – Paid software but works very well. Great for expressive facial animation.
- VRoid Avatar Diver – Free software made by Pixiv specifically for Vroid models. Simpler to set up than FaceRig.
I recommend FaceRig Studio for the best and most versatile tracking. But VRoid Avatar Diver is a free alternative that still works decently.
Here’s how to set them up:
For FaceRig:
- Download and install FaceRig Studio, available on Steam here. The Pro and Classroom licenses have better tracking.
- Import your optimized Vroid model into FaceRig and set it as the active avatar.
- In the Camera Input settings, choose your webcam and adjust the resolution if needed.
- Tweak the motion trigger thresholds to improve tracking accuracy.
- Test the tracking results with a range of facial expressions. Adjust FaceRig’s curve or magnet settings if needed to improve animation.
For VRoid Avatar Diver:
- Download VRoid Avatar Diver for free online.
- Install and launch the software. Click the + icon to import your optimized Vroid model.
- Access the input settings to choose your webcam. Adjust lighting and position to optimize tracking.
- Test out tracking by making expressions at the webcam. Sometimes touching your face helps improve tracking.
- If needed, reposition the webcam or adjust light levels to improve motion capture accuracy.
Fine tuning the tracking settings does take some trial and error. Pay close attention to how accurately and smoothly your head movements, facial expressions, and mouth shapes are being applied to the avatar.
Step 4: Connect Avatar to OBS and Other Streaming Software
With your Vroid model created and motion tracking set up, the last step is connecting it all to streaming software like OBS or XSplit.
Here is the process for OBS Studio:
- In OBS, add a new Video Capture Device source. Name it something like “Vroid Cam”
- Configure the device settings to use the video output from FaceRig or VRoid Avatar Diver. They output as a virtual webcam.
- Right click on the source and enable Chroma Key filtering. Select your green screen color if using a green screen setup.
- Arrange positioning, rescaling, etc as needed in the scene with your other elements.
- In Settings > Output, set the Video bitrate high enough to maintain avatar fidelity, around 6000 Kbps is a good starting point.
That covers the basics of getting your Vroid avatarinto OBS Studio. Other software works similarly – just add the virtual webcam output as a source.
Some additional tips:
- Use transparent images or virtual sets to overlay the avatar over different backgrounds
- Add source filters like Smoothing to improve video quality
- Enable Delay to align audio sync better if needed
- Experiment with resolution and bitrate settings to find the optimal balance of quality and performance
Step 5: Best Practices for Engaging Streaming
Once all the software is configured, the fun part comes – actually broadcasting with your awesome anime avatar! Here are some tips to maximize engagement and enjoy streaming as your virtual character:
- Get into character with your avatar’s personality – be energetic, emotive, and let the model’s appearance inform how you roleplay them on stream.
- When speaking, look directly into the camera so viewers feel like you are talking to them. Move around and use lively gestures.
- Recreate your model’s expressions and lip syncing as accurately as possible for the most natural look. Big exaggerated expressions work well.
- Interact with chat often, calling out users by name to boost engagement. The avatar can “read” chat messages and react.
- Use overlays and scenes to augment the stream. Change backgrounds, outfits, accessories to vary the visual style.
- Consider enabling Live2D physics in FaceRig/Avatar Diver so hair and clothes move more naturally as you shift around.
- Test starting and stopping tracking and the virtual webcam to ensure a smooth transition on stream.
- Encourage followers to create their own Vroid avatars so you can stream together as anime characters!
Streaming as a Vroid model takes effort to set up, but pays off in terms of unique streams that stand out. With lively animation via motion tracking and some streaming best practices, you can grow an engaged audience for your anime persona.
Common Questions
Does better hardware improve Vroid streaming?
Yes, investing in a higher end CPU, GPU, webcam and capture card will enable better video quality at higher resolutions and frame rates. But you can still stream Vroid avatars on a basic gaming PC and webcam.
Can I use iPhone/iPad as webcam for mobile streaming?
Yes, tools like iVCam or EpocCam allow using an iPhone or iPad as a high quality webcam input to PC streaming software like OBS. Wireless transmission works sufficiently well in ideal conditions.
What are the best practices for lighting with a Vroid model?
Use diffuse, even front lighting to avoid shadows. Soft boxes or reflectors work well. Avoid having bright backlight that makes you appear silhouetted. Proper lighting really improves motion tracking accuracy.
How do I change my Vroid model’s outfits or accessories?
To modify hair, clothes, accessories, etc you need to re-import the model back into Vroid Studio. Make your changes, then re-export and optimize as before. Load the updated model into your tracking app and OBS.
Can I convert other 3D models to Vroid for streaming?
Potentially yes – tools like CATS Blender Plugin can convert other 3D models to VRM format compatible with Vroid motion tracking apps. Results vary based on model topology and rigging. Expect to spend time troubleshooting.
Will using a Vroid model avoid DMCA issues with copyrighted music?
No, you still need broadcast rights for any background music used on streams, even with an original avatar. Mute copyrighted music to avoid DMCA strikes or use royalty free music exclusively.
Conclusion
Creating a customized anime-style Vroid avatar and using it for streaming takes some effort – but the results are really fun and engaging streams that stand out! With this guide, you now know how to setup Vroid models in software like OBS and connect motion tracking for natural animation. The key is optimizing the exported model, dialing in accurate tracking, and finding streaming best practices that bring your virtual character to life. Let me know if you have any other questions about using Vroid models for live streaming!
Disclosure: The articles, guides and reviews on BlowSEO covering topics like SEO, digital marketing, technology, business, finance, streaming sites, travel and more are created by experienced professionals, marketers, developers and finance experts. Our goal is to provide helpful, in-depth, and well-researched content to our readers. You can learn more about our writers and the process we follow to create quality content by visiting our About Us and Content Creation Methodology pages.
