If you’re dealing with the frustrating SOS Only error on your iPhone, fear not! You’ve landed in just the right place. This pesky message typically pops up when your phone can’t connect to its network carrier for various reasons. Thankfully, our seven-step process is here to help troubleshoot and banish any lingering SOS Only woes for good!
What Does SOS Mean on iPhone?
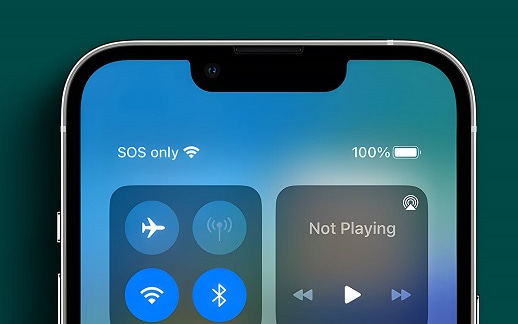
The SOS Only message pops up when the iPhone drops network coverage. Usually, this message is on the top-right corner of the screen, but iOS 15 users will find it on the top-left. Outside North America, “No Service” text message indicates that there’s no network coverage. It’s important to know these details so that you can troubleshoot your phone accordingly.
The “SOS Only” notification on an iPhone is not always a sign of lost cellular connection. In fact, it could pop up because the SIM card is inserted improperly or experiencing an issue. Additionally, it could display when attempting to use cellular data without subscription services designated for internet and calling purposes. The message appearing indicates that your iPhone has failed at establishing its network connections.
During a network outage, it’s essential to know that help is available. Apple has recently introduced an Emergency SOS feature through the Satellite function in their new iPhone 14. This groundbreaking capability permits direct satellite connections during emergencies, providing crucial information for emergency services to respond appropriately. The feature can prove extremely useful in critical situations, especially considering other phones only allow activation of the emergency call button by pressing power and volume buttons together.

How to Disable SOS Only on an iPhone?
If you’re struggling to fix the SOS Only mode on your iPhone, fear not! We’ve got you covered with seven easy-to-follow steps that’ll get your phone back to normal in no time!
Check Network Coverage
The SOS Only message on the iPhone pops up when it is in a network deprived area. To fix this issue, try moving to a place with better network coverage.
Verify Your SIM Card
When an iPhone shows the “SOS Only” message, it could indicate a poorly placed or defective SIM card. To resolve this issue, simply follow these two steps: First, remove the SIM tray and ensure that the card is correctly placed. If not, adjust as needed and re-insert the tray securely into your phone. If that doesn’t work, then inspect the SIM card for any visible signs of damage; if you find any, replace it with a new one before properly inserting it back into your device.
Restart Your iPhone

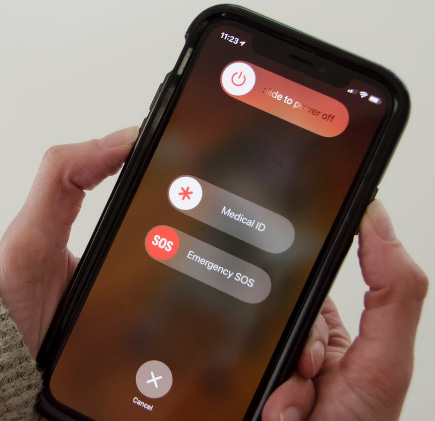
Sometimes your iPhone might show an SOS Only issue, but don’t worry! Here’s a quick fix: simultaneously press the power and volume buttons. You’ll see a message on your screen that allows you to turn off your phone – slide the toggle on the right side of the screen. Wait for about one minute, then press and hold the power button until you see the Apple logo appear. Congratulations! Your iPhone is now restarting and should be back to normal in no time.
Check Airplane Mode
When the Airplane Mode is activated on an iPhone, making calls or enabling cellular data becomes impossible. To switch it off, swipe downwards from the top-right corner of the phone’s screen and click on the Airplane Mode icon.
Verify Your Network Settings

Resetting your network settings can help resolve the SOS Only feature. If you experience connectivity issues, it’s worth considering resetting your network settings. Resetting erases all Wi-Fi devices data, VPN passwords, and current network settings to restore them to their default state. To get started, follow these simple steps below.
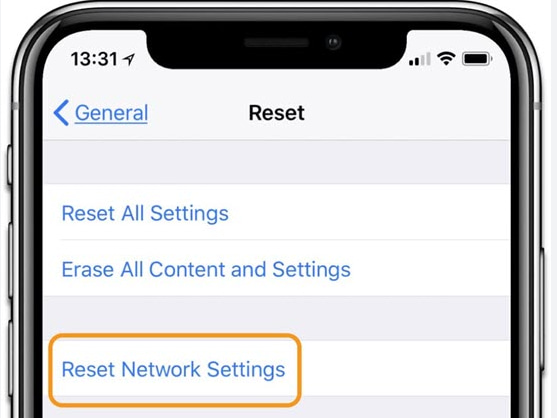
To reset your iPhone’s network settings, follow these easy steps: First, open the Settings application.
Next, scroll down until you see “General,” and tap on it. Then find and select “Reset” from the menu options.
Select “Reset Network Settings” to restore the default network settings.
Install and Update iOS
If you’re having any trouble with your iPhone, it might be because of a bug in the operating system. Luckily, there’s an easy solution – installing the latest iOS update is a great way to eliminate any issues you may have been experiencing. To check for updates and upgrade your phone:
1. Go to “Settings.” and select “General”.
3. Tap on “Software Update.”
4. If an update is available, follow the instructions to install it. It’s important to stay up-to-date with the latest version of iOS as it can prevent future problems from occurring as well!
Contact Your Network Carrier
If you’ve tried all the previous troubleshooting steps and still can’t resolve the issue, don’t hesitate to reach out to your network carrier for assistance. They might provide a replacement SIM card or help you navigate through network outage and service disruptions.
FAQs
How can I fix my iPhone SOS Only issue?
To resolve the SOS Only issue on an iPhone, make sure that there is a strong cellular network signal by checking for full network bars. Additionally, confirm whether Airplane Mode is off and check if the SIM card is in its correct position. Restart the phone to see if any updates are available. If none of these steps solve the problem, kindly get in touch with your mobile service provider for further assistance.
What does SOS mean on an iPhone?
The iPhone SOS feature lets users make emergency calls using the cellular network. In case of an emergency, you can pre-set a list of contacts to quickly reach out to. After calling for help, all designated contacts receive a notification message from your iPhone. Additionally, you have the option to cancel or deactivate this notification if you wish.
How can I turn off SOS Only?
To turn off the SOS Only mode on an iPhone, one should access the Settings app and look for options labeled “Emergency SOS” or “SOS Only”, before disabling or toggling these features off. This will disable the functionality of SOS Only mode on your iPhone.
Bottom Line
Dealing with the “SOS Only” issue on an iPhone can be very frustrating. However, a comprehensive list of steps has been provided to help resolve this problem including troubleshooting measures to ensure that the SOS feature functions seamlessly in emergency situations. Following these steps carefully will lead to a better user experience.
Disclosure: The articles, guides and reviews on BlowSEO covering topics like SEO, digital marketing, technology, business, finance, streaming sites, travel and more are created by experienced professionals, marketers, developers and finance experts. Our goal is to provide helpful, in-depth, and well-researched content to our readers. You can learn more about our writers and the process we follow to create quality content by visiting our About Us and Content Creation Methodology pages.
